 . That will open the form below:
Below are the steps to use the Staffing Analysis Wizard:
1. While
in the Staffing Analysis Module, click on the Staffing Wizard button . That will open the form below:
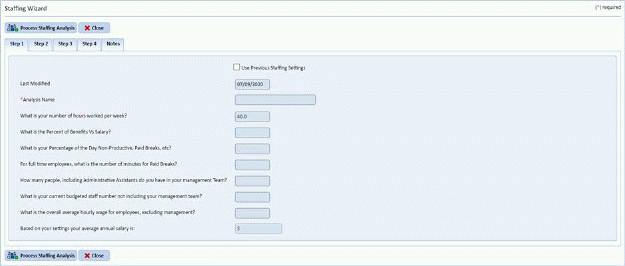
2. As you
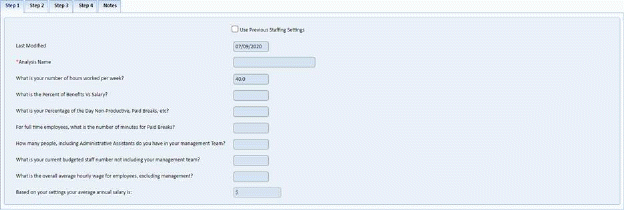
can see, there are 4 “steps” to complete. For Step 1 or the first tab,
enter the necessary information: Note: If you were working in
a previous Staffing Analysis you can check the Use previous staffing Settings
box and the defaults from that analysis
will be applied to the current analysis.
and the defaults from that analysis
will be applied to the current analysis.
3. Go to each “step” or tab and enter the necessary information as required:
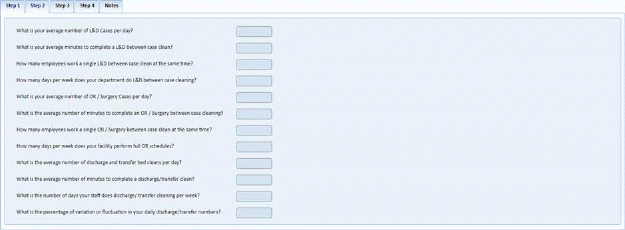
The “Step 2” or tab above allows you to specify average L&D cases, OR cases, time to perform discharges, etc.
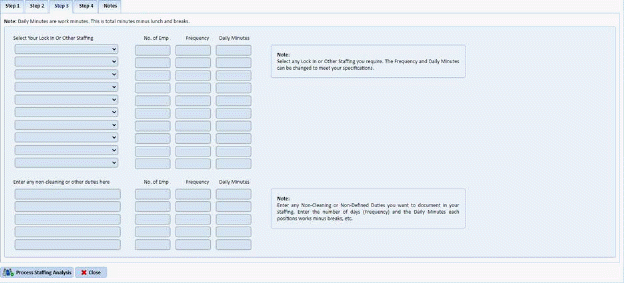
The above “Step 3” or tab allows you to enter Lock In areas.
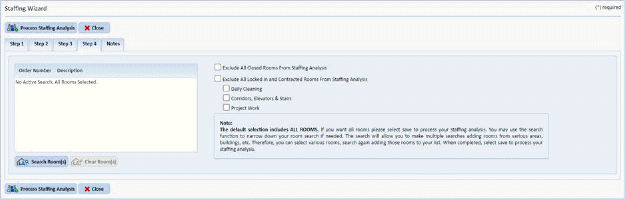
4. For “Step 4” or the 4th tab, this allows you to limit your staffing to specific rooms. The default setting for this tab includes all rooms.
5. The final tab, “Notes”, allows you to specify notes regarding the staffing analysis you are performing. Notes like sources of information (averages values for L&D, OR, etc.) are entered here; which is very helpful at a later review.
6. When
all the necessary information has been entered, click on the Process Staffing
Analysis button  to both save and
complete the Staffing Analysis. Otherwise, click on the Close button
to both save and
complete the Staffing Analysis. Otherwise, click on the Close button to cancel the whole process.