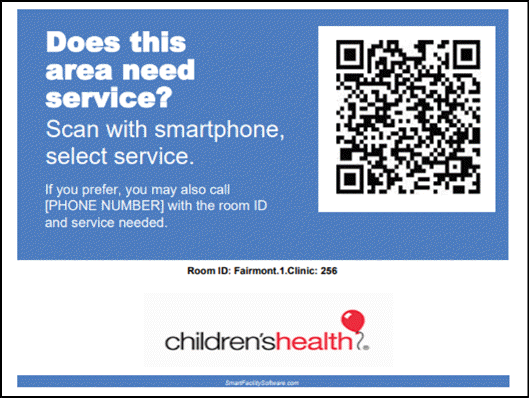
This feature is useful to customize the signs for selected rooms.
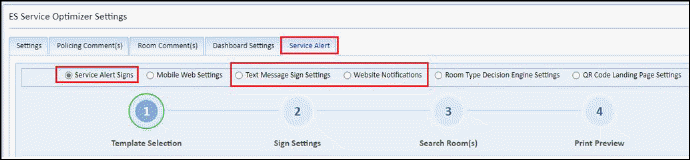
- Service Alert Signs new radio button is added in Preferences > ES Service Optimizer settings> Service Alert Tab (refer screenshot)
- Sign C
- Sign Creation Steps Progression shown at top as number menu. Number circle is highlighted after completion of selected step and user can navigate through steps by clicking on the number during progression. (refer above screenshot)
- After clicking on “Service Alert Sign” radio button following screen is shown, which include below 4 steps
1. Template selection
2. Sign Settings
3. Search Rooms
4. Print Preview
l Step 1: Template selection
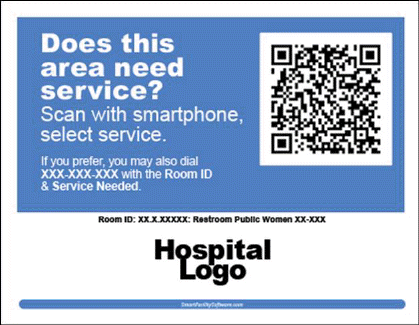
- In Step 1 User can select Template type as QR Code, Text or Both using radio button. By default QR Code and Sign: 11" x 8.5" options are selected.
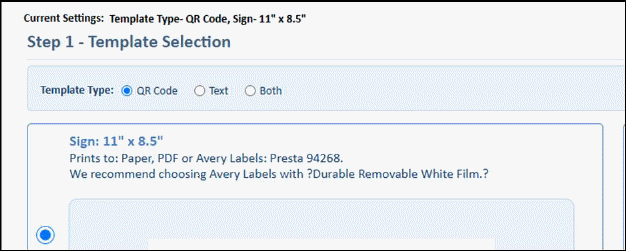
- When “QR Code” radio button is selected, QR Code sign templates are displayed.
-
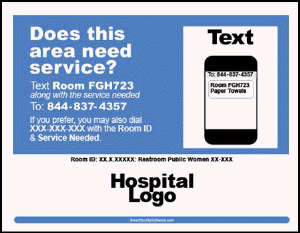
- When “Text” or “Both” radio buttons are selected then templates with Text or Both are displayed.
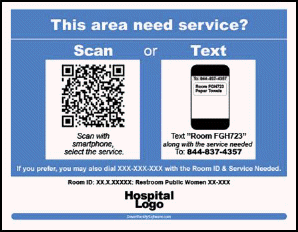
Step 1: Template selection Screen

- Current Settings- shows the selected template type and sign selected.
l Step 2: Sign Settings
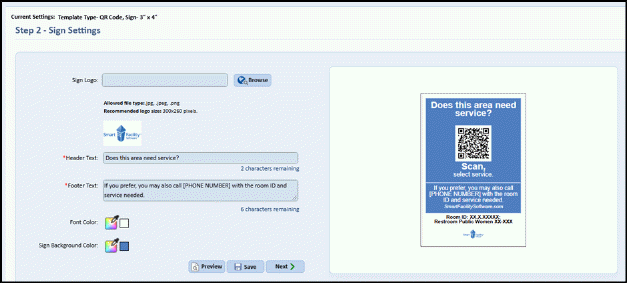
- Users can set the sign logo, header and footer text.
- Also, user can set background and font color.
- The changes made in
the left section can be applied to right section by clicking on “Preview”
 button.
- The settings can be
saved to database by clicking on “Save”  button.
- Users can move to the
next step by clicking on “Next”  button.
l Step 3: Search Rooms(s)
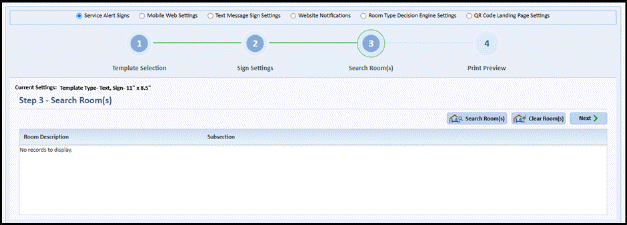
- In step 3, user can
search rooms by clicking on “Search Rooms(s)” 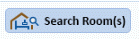 button.
- After clicked on Search Room(s), room search pop up is shown. Refer below screenshots-
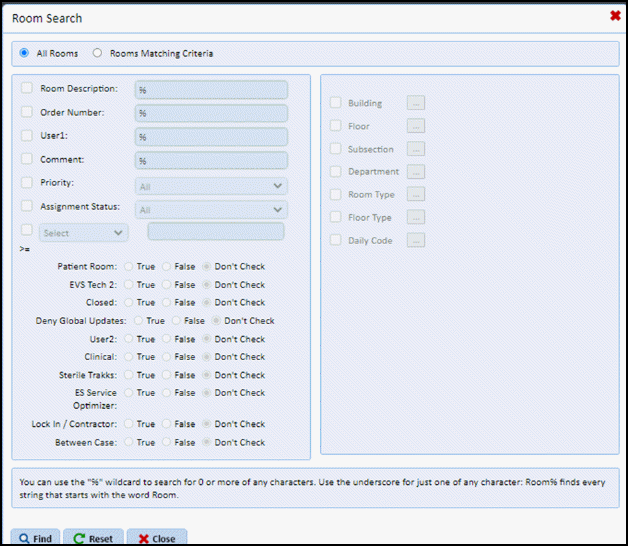
- User can filter the
rooms by clicking on Find button on room search pop up. User can select maximum
300 rooms at a time.
Refer below screenshots-
- Selected rooms can be
cleared using the “Clear Room(s)”  button.
- User can navigate to
next step using “next”  button.
l Step 4: Print Preview
- Note - “Go to Avery.com to order labels. We recommend choosing “Durable Removable White Film” as the material for your Avery Labels.” is added on page.

- User can export as
PDF or print report using “Save as PDF” 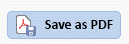 button.
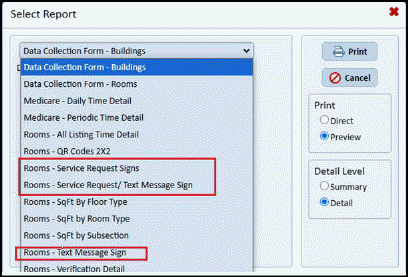
l Report changes:
- Generated PDF report for “Rooms - Service Request Signs” report which generates PDF as per selected template settings.
- The below rooms report is renamed as:
1. “Rooms - Service Request/ Long Code Labels” to “Rooms - Service Request/ Text Message Sign”
2. “Rooms -Long Code Labels” to “Rooms - Text Message Sign”
l Create Signs on ES Service Optimizer Homepage:
- Added a
button “Service Alert Signs” on ES Service Optimizer
Homepage. User can redirect to “Service Alert” module by clicking on “Service Alert Signs” button.
Refer below
screenshot-

l Label changes on ES
Service Optimizer :
-
Change
“Long Code Label Settings” to “Text Message Sign Settings”
Refer below
screenshot-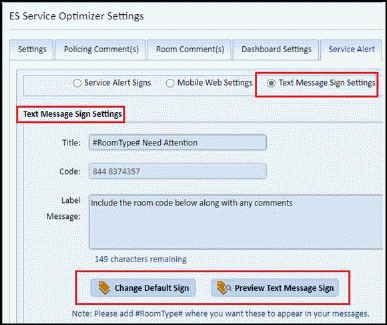
-
Change
“Web
Role Notification Settings” to “Website Notifications”.
Refer below
screenshot-