
Below are the steps to log room tasks:
1. Tap on the Log Clean/Policing button ( A Synchronization will occur if you have not entered the module recently).
2. Users have several options of searching for rooms they clean/police.
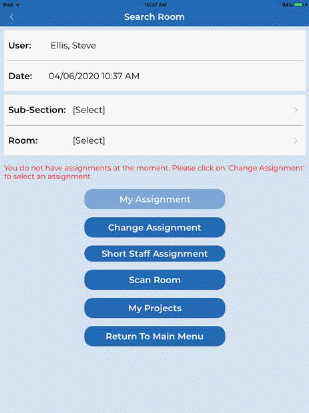
Below are the methods by which, rooms can be selected:
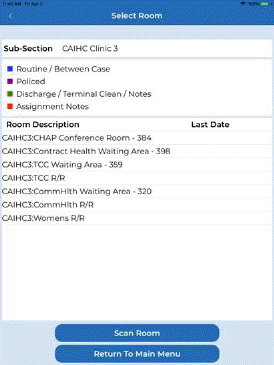
Subsection – Facilities in ES Optimizer are divided into buildings. Buildings are divided into floors. Floors are divided into subsections. Rooms are located inside subsections. Below is a sample:

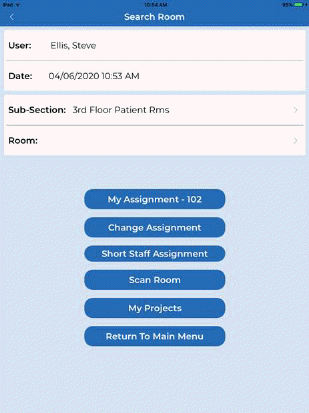
My Assignment – This button gives the user a list of rooms that are part of his/her employee work assignment. This is only applicable if the user has an assignment, below is an example:

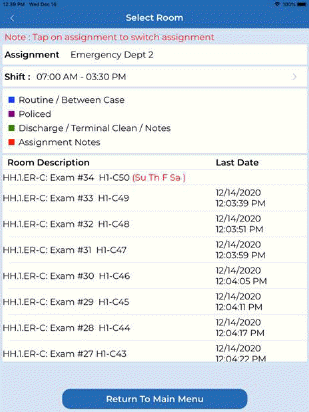
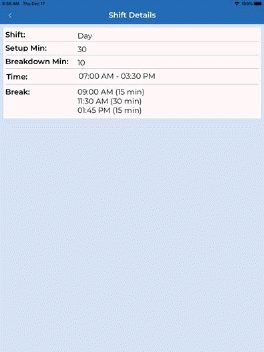
Note: Above right is the update to include the shift and the days per week if less than the daily assignment frequency. Tapping the “Shift:” bar yields more information as shown below:
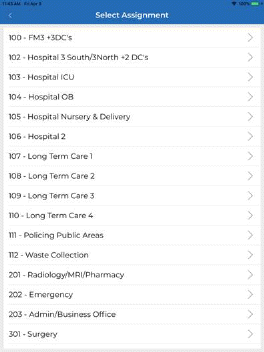
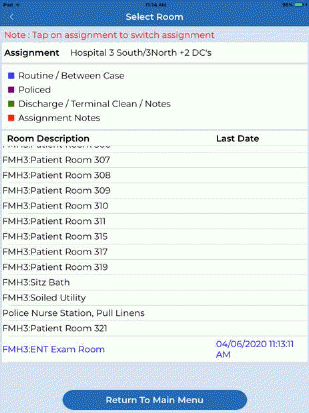
Change Assignment – This button allows the user to change to other assignments.
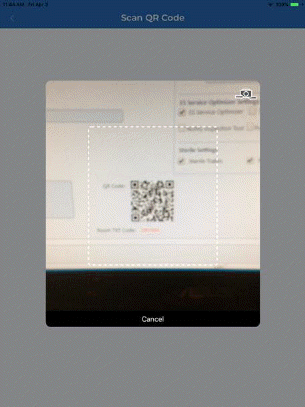
Scan Room – This allows the user to use the camera function of the Apple Device to scan the QR code of a room to find it in the database.

Short Staff Assignment – This button allows the user to work from a Short Staff Assignment that has been built in Daily Assignments > Short Staff Assignments in ES Optimizer.

3. Tap on a note or room decryption you wish to mark as complete, cleaned, or policed you will see a screen similar to the one shown below:
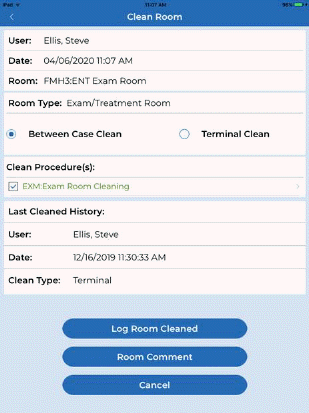
4. Notes that display in Red are for comment purposes only and cannot be completed. Depending upon the room type selected, you will be able to Log the room cleaned (routine, between case, terminal, discharge, or policed). In the case above we will leave between case clean selected and tap the “Log Room Cleaned” button. A brief synchronization will occur and the room will appear at the bottom of the list of rooms color coded as the legend indicates.
5. You may mark a patient room vacant by unselecting the patient bed(s) that are vacant as you clean or police the room as shown below left (Bed B is vacant). The user may also use the Room Comment button to add a predefined or free text comment to the room as shown below right.

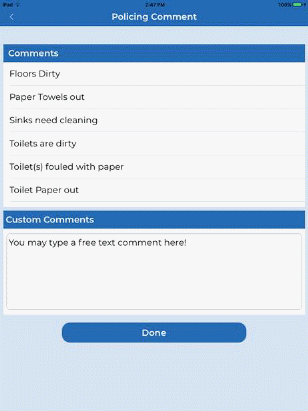
6. If user is policing a room, the ability to select what was corrected in the room as well as the ability to add a free text comment is also provided as shown above (right).
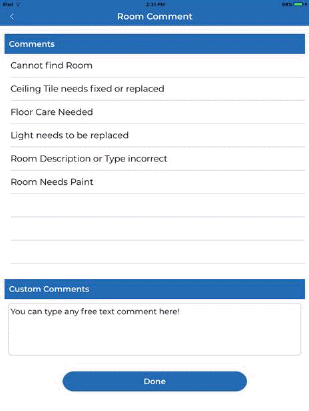
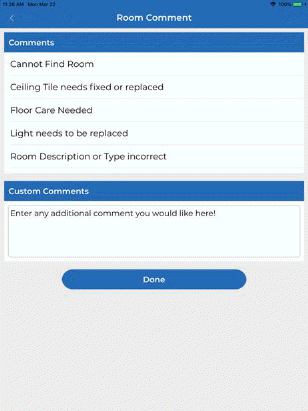
7. User may also use the “Room Comment” button as shown above (left) where user may select a predefined room comments or enter a free text comment or both as shown below:
Below is an example of the policing comments that can also be entered when choosing to police clean an area.
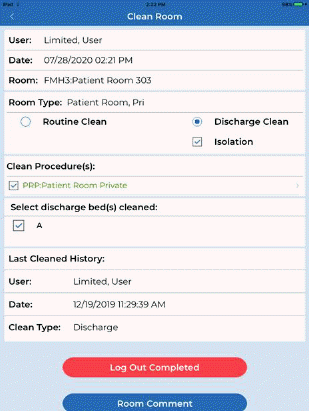
8. If the user is discharge cleaning a room the option to mark the room as Isolation is provided and the ability to track total cleaning time may be enabled. The screen shots below show an example:

NOTE: User may use any or all of the room selection options during the course of their daily cleaning operations.
My Projects – This allows the user to see a list of rooms that require project cleaning. This is only applicable if the user is a project worker and has projects assigned to him/her.

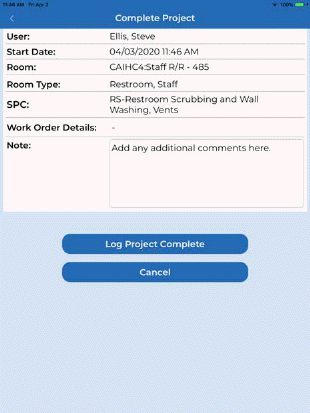
1. Select the project you wish to complete from the list, add any comments as needed and tap Log Project Complete once the project has been completed.
2. User may also schedule their own projects by tapping the schedule Project button. the following screen will be shown:
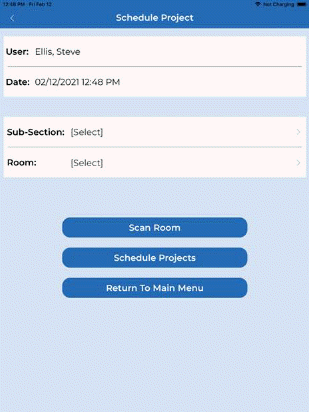
3. User may select a subsection and a room or if QR code is available they can use the “Scan Room” button to select it. An example is shown above right.
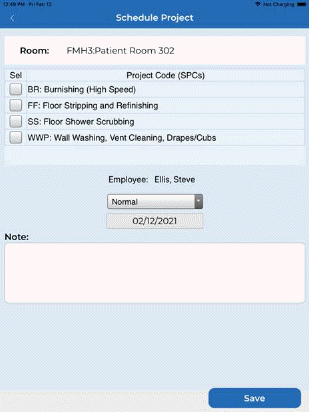
4. User can then select the project, the priority, the date to perform, and add any note they would like.
5. The last step is to “Save” the project. The saved project will now appear in the list of projects available in “My Projects”
Note: As a technician, the user can only schedule projects for themselves.
Tasks
The Tasks button shows the employee all the tasks supervisors may give in addition to their normal routine. Tapping on the Tasks button opens the figure below:
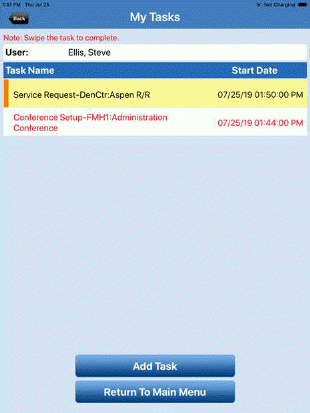
From here, users can view their tasks, add their own tasks, and complete them using the Swipe function [place finger on task and swipe to left to complete]. Users can also get additional details about their tasks by tapping on the task name as shown in the figure below:
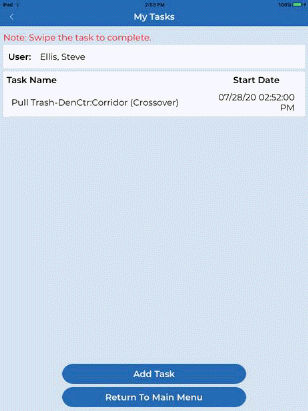

Add Task - To create a task follow the procedure shown below:
1. To create a new task, tap the "Add Task" button.
2. Complete as much of the task information as possible including the location and additional comments as needed. NOTE: tapping fields allows for modification to start time, end time, priority, location, comments, and the billable checkbox. See example below:
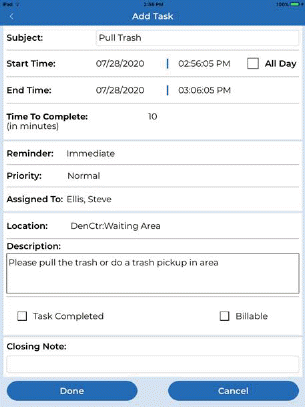
3. Tap “Done” if you have finished with the creation of the task and wish to complete it later.
4. You may complete the task immediately upon creation by checking the “Task Completed” checkbox and adding a closing note if desired and tap the “Done” button.
5. Upon completion of the task you may swipe the task from right to left to display the “Complete Task” button as shown below.
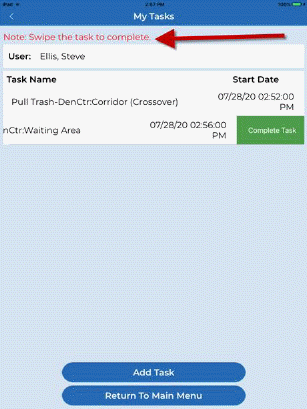
6. Tap the Complete Task button to complete the task. Note: You will not be able to add a closing note when completing the task in this manner.
7. If you need to add a closing note open the task, add the closing note, and then tap the “Complete Task” button.