 to
open the Quality Management Supervisor List:
to
open the Quality Management Supervisor List:The process below shows how to create an inspection with the rooms randomly selected by the system:
1. Click
on the Quality Management button to
open the Quality Management Supervisor List:
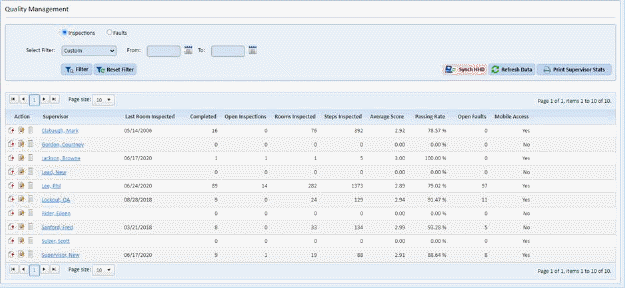
2. Select the Supervisor involved in the inspection.
3. Click
on the Add Inspection  button before
the Supervisor Name. You will see the Add Inspection form below:
button before
the Supervisor Name. You will see the Add Inspection form below:
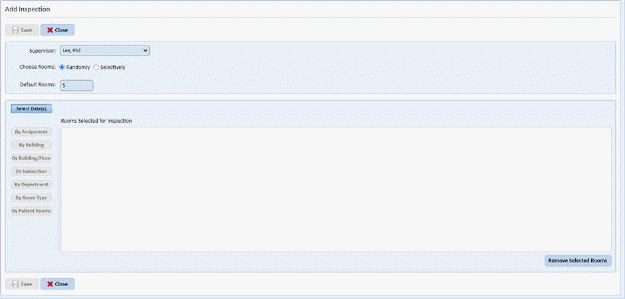
4. Select
the Supervisor  who will perform the
inspection.
who will perform the
inspection.
5. Select the Randomly option for the Choose Rooms selection:

6.
Specify the number of rooms to be inspected in the Default Rooms field  .
.
NOTE: The number listed in the Default Rooms field will be the number of rooms for one date only. If several dates are selected for inspection dates, the number of rooms in the Rooms Selected for Inspection table will be divided between the selected dates.
7. Click
on the Select Date(s) button 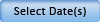 to
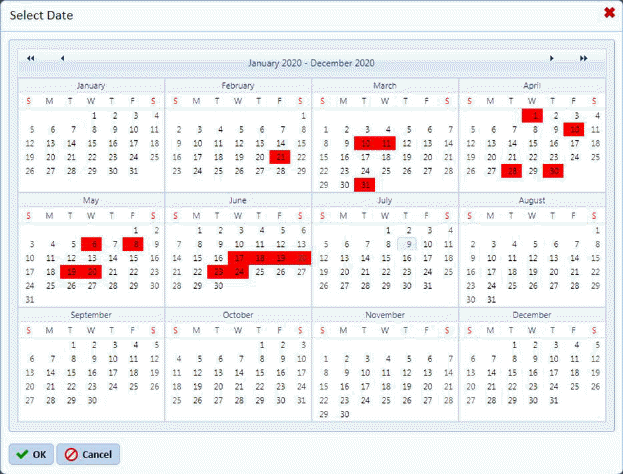
schedule your inspection(s). This button opens the figure below:
to
schedule your inspection(s). This button opens the figure below:
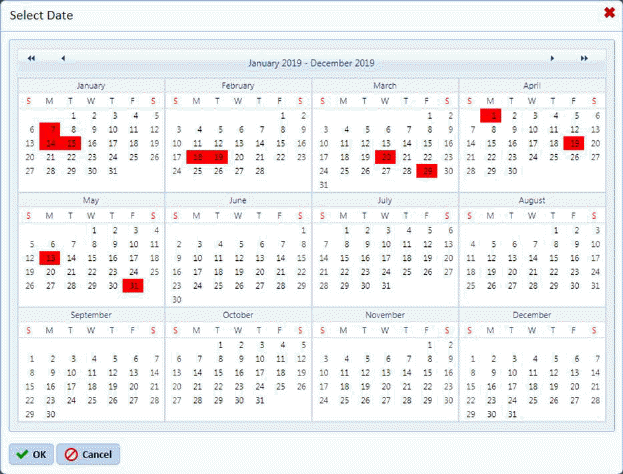
NOTE: Dates in the calendar are colored differently. Red means that an inspection has been scheduled for those dates. White areas mean that the days are open to schedule inspections. Gray area(s) is/are your selected or current date(s).
8. Select the date for your inspection using this calendar. You can also select multiple dates for your inspections. However, the rooms you will select are divided between the selected dates when possible. If five rooms were selected for the inspection and three dates, then the five rooms would be divided between the three days with two rooms on one day, two rooms on another day, and one room for the last day. Using the mouse, click on the date(s) you desire. The dates selected will highlight in gray. Dates marked as red will not be available to use for inspection.
9. If you are content with your dates, click on the OK button. Otherwise click on the Cancel button. Canceling the date selection will require you to re-do steps 8 and 9.
10. After selecting the date(s) for your inspection, you will be taken back to Add Inspection dialog box:
Notice a change in the Add Inspection window:  . This shows the scheduled date for the
inspection.
. This shows the scheduled date for the
inspection.
11. You have a choice as to how the rooms can be selected using the buttons below:
By Assignment 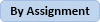 – Clicking on this button opens the
dialog box below:
– Clicking on this button opens the
dialog box below:
In this dialog box, the user can set the criteria with the Supervisors drop down list and whether the assignments are Open, Closed, or All. The supervisor criterion setting shows only those assignments a supervisor handles. The rooms are selected from any of the assignments themselves. The user can select the assignments with the rooms he wants included in the inspection.
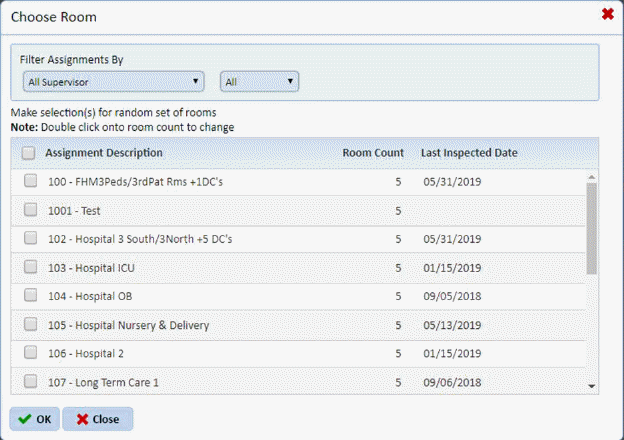
By Building  –
Clicking on this button opens the dialog box below:
–
Clicking on this button opens the dialog box below:
By Building/Floor 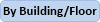 – Clicking on this button opens the
dialog box below:
– Clicking on this button opens the
dialog box below:
This dialog box works like the previous dialog box except for the fact that rooms are selected on a per floor basis rather than per building basis. The user can select the floors with the rooms to include in the inspection.
By Subsection  – Clicking on this button opens the
dialog box below:
– Clicking on this button opens the
dialog box below:
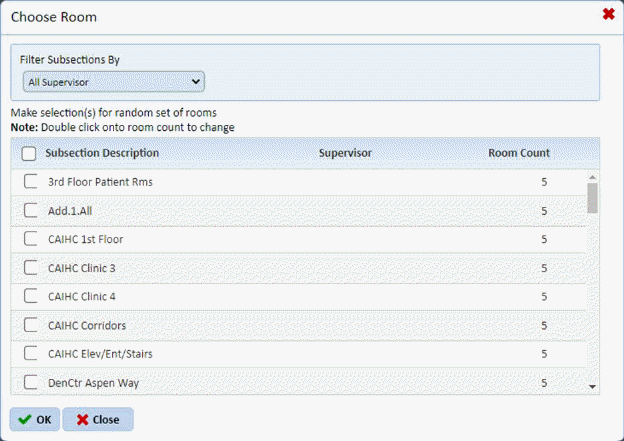
In this dialog box, the user can set the criteria with the Supervisors drop down list. The supervisor criterion setting shows only those subsections that a supervisor handles. The rooms are selected from the subsections. The user selects the subsections with the rooms to include in an inspection.
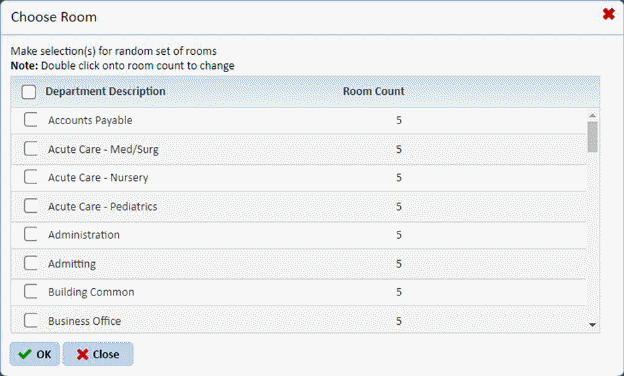
By Department  - Clicking on this button opens the
dialog box below:
- Clicking on this button opens the
dialog box below:
By Room Type  –
Clicking on this button opens the dialog box below:
–
Clicking on this button opens the dialog box below:
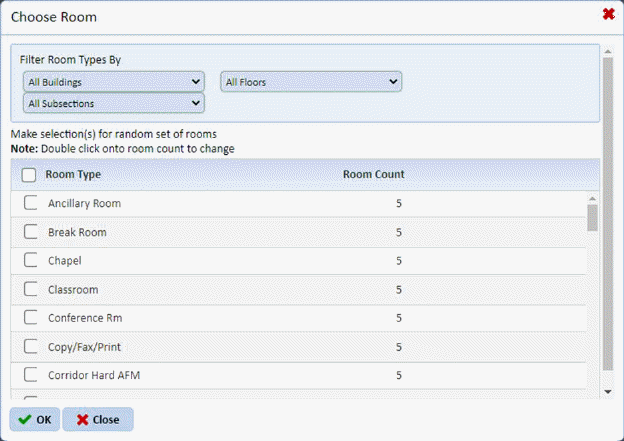
In this dialog box, the user can set the criteria for where the rooms may be located using the Buildings, Floors, and Subsections fields. The Buildings/Floors/Subsections field criteria setting show only those room types that are available in the selected building/floor/subsection. The user selects the room types that have rooms fulfilling all specified criteria to include in an inspection.
By Patient Rooms 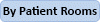 – Clicking on this button opens the
dialog box below:
– Clicking on this button opens the
dialog box below:
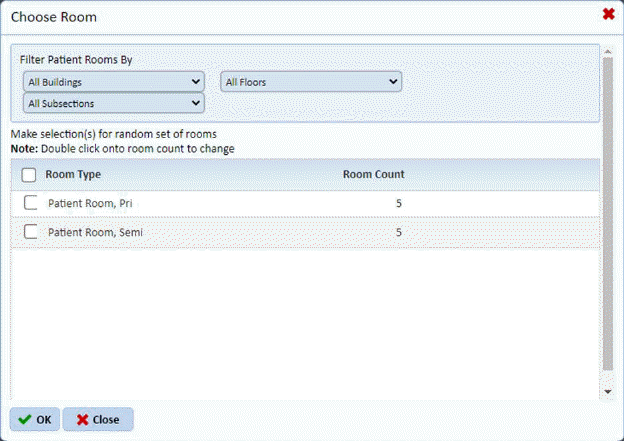
Similar to the previous dialog box, the user can set the criteria for where the patient rooms may be located using the Buildings, Floors, and Subsections fields. The Buildings/Floors/Subsections field criteria setting show only those patient rooms that are available in the selected building/floor/subsection. The user selects the patient room types that have rooms fulfilling all specified criteria to include in an inspection.
NOTE: User can mix and match their inspections with any combination of rooms using the buttons listed above.
12. Depending on your choice above, you will be given a list of rooms. Below is an example:
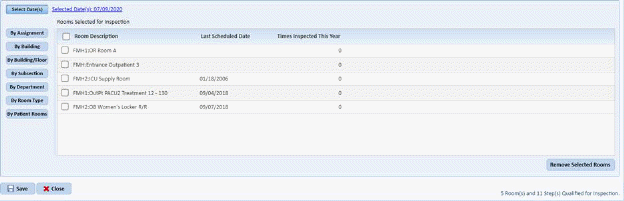
At this point, you can review the rooms the Quality Review
generated for inspection. If there is a room you do not want included in
the inspection, select the room by clicking on the check box before the Room
Description and click on the Remove Selected Rooms button .
.
13. If you are
satisfied with the rooms and date for the inspection, click on the Save
button . To cancel, click on the
Close button
. To cancel, click on the
Close button .
.
14. Click on
the Print QA Report button  if you
want a paper copy of the inspection you created.
if you
want a paper copy of the inspection you created.
15. Please note that all inspections are randomly generated based on your criteria. Each inspection will have its own unique set of rooms.
16. Repeat steps 2 through 14 for all other inspections you want to create.