 to open the
Personnel module.
to open the
Personnel module.To create your schedule, do the following:
1. Click
on the Personnel button to open the
Personnel module.
2. If there are no Schedules available, then you will receive the prompt below:
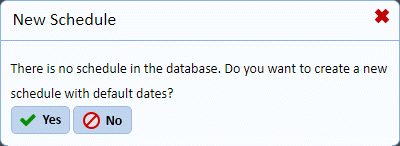
3. If you click on the Yes button, then ES Optimizer will create a Schedule with default Dates. This means that it will take the first upcoming starting day of your rotation and use that as a starting date. The rest of the dates are filled in appropriately.
4. Click
on New button  to open the figure
below:
to open the figure
below:
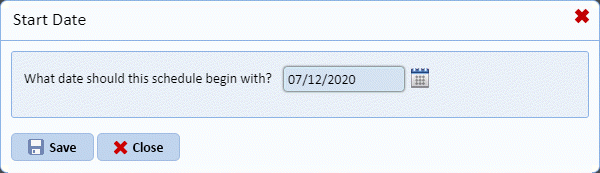
Notice that the date presented will be the first day available for the start of the rotation. In this case, the starting date is 2/19/2017, which is a Sunday. In this example, the schedule is a two week rotation set up to start on Sundays.
5. If the
date provided is not appropriate, enter the first date of your days off rotation
and then click on Save button . You
will get prompted with the confirmation figure below:
. You
will get prompted with the confirmation figure below:
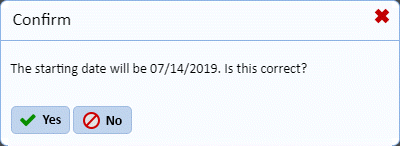
6. Click
on the Yes button  to confirm the
specified date. To cancel, click on the No button
to confirm the
specified date. To cancel, click on the No button .
.
7. After the days compile (this may take a few minutes) you will have a 14-day or greater schedule with the start date you specified.
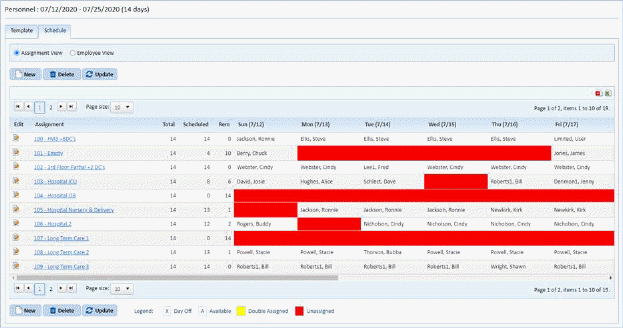
The Schedule tab also allows you to change views
(Assignment or Employee) by clicking on the appropriate radio box . These views simply arrange the table in order
by Assignment or Employee, respectively.
. These views simply arrange the table in order
by Assignment or Employee, respectively.